Friday, October 2, 2015

Difference between Encapsulation and Abstraction in OOPs (C#.NET)

Introduction:
There are 4 major properties of Object Oriented Programming (OOPs) as you know. These are

  1. Abstraction
  2. Encapsulation
  3. Inheritance
  4. Polymorphism
Among of these four properties or features we will discuss about the first two (Abstraction and Encapsulation) in this post. 

Description:

So what actually Abstraction and Encapsulation are? Lets us know with an example

Abstraction:
Abstraction is a process to abstract or hide the functionality and provide users or other programmers to use it only. Like for the method Console.WriteLine(), no one knows what actually happening behind the function calling. We  are just using it by calling and passing the arguments. This is the thing called Abstraction. 

Encapsulation:
Encapsulation means to encapsulate or put every thing into one thing and provide others to use it. Like in a shaving kit there are all the necessary kits are available. And also these kits are available as loose in market. But the shaving kit is encapsulate every other kits into a small bag and provide user to use it. 

Hope so now you have a basic idea about both of these properties, Lets see a real world example of encapsulation and abstraction.

Lets assume you have to create a method to insert an users data and pass it to other developers to use. So first create a class and add a method to insert the data into database with validation. 

There will be three fields 
  1. Name 
  2. Email
  3. Phone number
So these inputs have to validate first and then insert into db.

First create a class with all methods

class User
{
    public bool AddUser(string name, string email, string phone)
    {
        if (ValidateUser(name, email, phone))
        {
            if (AddtoDb(name, email, phone) > 0)
            {
                return true;
            }
        }
        return false;
    }

    private bool ValidateUser(string name, string email, string phone)
    {
        // do your validation
        return true;
    }

    private int AddtoDb(string name, string email, string phone)
    {
        // Write the Db code to insert the data
        return 1;
    }
}

As you can see there are three methods are written in this User class. 
  • AddUser: To call from outside the class. That is why the access modifier is public.
  • validateUser: To validate the user's details. Can't access from out side the class. Its private.
  • AddtoDb: To insert data into database table and again it is private, can't access from out side the class.
Now another user will just call AddUser method with parameters. And that user has no idea what is actually happening inside the method. I didn't write the code to validate and insert into db, as you can get it from others examples. We will discuss about it later. 

To call the AddUser method do like following. 

class Program
{
    static void Main(string[] args)
    {
        User objUser = new User();
        bool f = objUser.AddUser("Arka", "ark@g.com", "1234567890");
    }
}

Now come back to the main discussion.

Here we are hiding the procedure of adding data into database from other users, this is Abstraction. And putting all the three methods into one User class and provide other user to use it that is called Encapsulation

So procedure hiding is Abstraction and putting every necessary things into one is Encapsulation.   
Hope so you have cleared your doubt about the concept of  Encapsulation and Abstraction. 

Sunday, July 19, 2015

E-ICEBLUE, Your Office Development Master

E-ICEBLUE, Your Office Development Master
iText sharp is one of the 3rd party component to use for PDF, Word, Excel, Power Point creation and others in .NET, Now here are E-ICEBLUE to make your office experience even better with .NET. It comes with both C# and VB.NET component. Just download and add the dll into your solution, use their code to create your PDF, Word, Excel or Power Point.

What E-ICEBLUE offers ?

Here are the full list of offers that E-ICEBLUE have for you.
  1. Spire.Doc
  2. Spire.DocViewer
  3. Spire.XLS
  4. Spire.Presentation
  5. Spire.PDF
  6. Spire.PDFViewer
  7. Spire.PDFConverter
  8. Spire.DataExport
  9. Spire.BarCode
All these are offered by E-ICEBLUE to make your Office experience better. Demos are available in their site. Lets see how it works..

How it works? 

For each and every product you have to download the installation file and install this. Now add the add the dll files into your project, as example..

For Spire.Doc download the file and install it in its default path(C:\Program Files\e-iceblue\Spire.Doc). Now add the dll file into your project by browsing the file into default folder or where you have installed. Similarly same thing goes for others also.

As you add the dll files into your project you have to add the namespaces into your VB or CS file. 

C#.NET
using Spire.Doc;
using Spire.Doc.Documents;

VB.NET
Imports Spire.Doc
Imports Spire.Doc.Documents

As you add those namespaces you are now able to access the class to create your doc,
excel,power point and pdf files just by calling the method. 

Let us see how to create a simple doc file in just few lines.

C#.NET
//Create word document
Document document = new Document();

//Create a new paragraph
Paragraph paragraph = document.AddSection().AddParagraph();

//Append Text
paragraph.AppendText("Word file by using Spire.Doc");

//Save doc file.
document.SaveToFile("Sample.doc", FileFormat.Doc);

//Launching the MS Word file.
try
{
System.Diagnostics.Process.Start("Sample.doc");
}
catch { }

VB.NET
'Create word document
Dim document_Renamed As New Document()

'Create a new paragraph
Dim paragraph_Renamed As Paragraph = document_Renamed.AddSection().AddParagraph()

'Append Text
paragraph_Renamed.AppendText("Word file by using Spire.Doc")

'Save doc file.
document_Renamed.SaveToFile("Sample.doc", FileFormat.Doc)

'Launching the MS Word file.
Try
System.Diagnostics.Process.Start("Sample.doc")
Catch
End Try


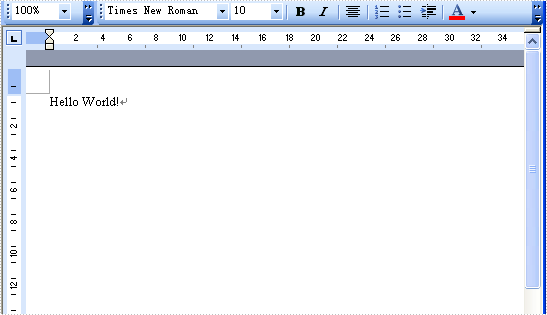
Output:

How simple to create a doc file. Same thing happens also for Excel, PDF, Power Point. Here I have seen only for Windows application, they have provided also in Silverlight and WPF. 

To check all tutorials you can go for following links.
  1. Spire.Doc
  2. Spire.DocViewer
  3. Spire.XLS
  4. Spire.Presentation
  5. Spire.PDF
  6. Spire.PDFViewer
  7. Spire.PDFConverter
  8. Spire.DataExport
  9. Spire.BarCode
Also you can use the API of Spire.Doc, Spire.DocViewer, Spire.XLS, Spire.Presentation, 
Spire.PDF, Spire.PDFViewer. For that click here.

Important links:

For products visit E-ICEBLUE.
For tutorial visit E-ICEBLUE Tutorials.
For video tutorials E-ICEBLUE Video Tutorials
For purchasing visit E-ICEBLUE.

Friday, July 3, 2015

Image slider from a folder in MVC 4.0

In this post we will learn about to create a HTML JQuery CSS slider where images are binding from a specific folder. Means you just have to add a folder name and rest of the work will be take care of the code.

All we need a pack of JQuery slider. As I found one from my hard disk, I will do with this. 

Step 1:

After creating a new project you have to put all the resources like images, JavaScript and css files into new solutions. We have taken a empty MVC project as Razor view engine. 


As we all can see the assets folder is the resources that we have imported from our HTML Jquery. img folder in assets is the main folder from which we are fetching the images to create a slider.

Step 2:

As we take an empty project we have to build a new controller, so we created a new controller named HomeController and in model folder created a new model named Slider.cs.

Step 3:

Now lets create the Slider.cs file first. It will took two things. One is src (this is the source of the image) & second one is title (Title and alt of the image)

namespace MVCImageSliderFromFolder.Models
{
    public class Slider
    {
        public string src { get; set; }
        public string title { get; set; }
    }
}


Step 4:

Now its time for the controller. This is the main thing to get manage all the images and send that to View part to show.

Before proceeding we must have to discuss about the algorithm, which is actually happening. 

Get the Folder Name -> Search all the images(.jpg, .png and others...) -> Make a list of that with source and title -> Send to view for showing the slider.

So lets proceed with searching all the files/images from the desired folder. 

string[] filePaths = Directory.GetFiles(Server.MapPath("~/assets/img/"));

In this way we will get all the files in the folder ~/assets/img. Now we have to create a List of type Slider to pass this to View. To do this...

List<Slider> files = new List<Slider>();
foreach (string filePath in filePaths)
{
      string fileName = Path.GetFileName(filePath);
      files.Add(new Slider{
            title= fileName.Split('.')[0].ToString(),
            src = "../assets/img/" + fileName
      });
}

Now in the List files we have the source and the title of all the files/images present in img folder. Now send this to View by    return View(files);

Step 5:

Now the last part is left to do. Bind the model to View part and your slider is ready. 


First of all add the resources at the top of the HTML file (Header section).

<link rel="stylesheet" href="../assets/bjqs.css">
<link href='http://fonts.googleapis.com/css?family=Source+Code+Pro|Open+Sans:300' rel='stylesheet' type='text/css'>
<link rel="stylesheet" href="../assets/demo.css">

<script src="http://code.jquery.com/jquery-1.7.1.min.js"></script>
<script src="../assets/js/bjqs-1.3.min.js"></script>
<script src="../assets/js/libs/jquery.secret-source.min.js"></script>

Now add the slider, as we are dealing with only the slider we don't need to worry about all other stuffs. If it is a full web page then you can add a Partial View and pass the Model on that and create the slider portion in that Partial View.

To create the slider....

<div id="banner-fade">
    <ul class="bjqs">
       @foreach (var item in Model)
       {
           <li>
               <img src='@Html.DisplayFor(modelItem => item.src)'
                     title='@Html.DisplayFor(modelItem => item.title)' alt="">
           </li>
       }
    </ul>
</div>

Write a loop to create the li within ul. All you is done. Only left is to call the javaScript function to run the slider. To call this

<script>
jQuery(function ($) {
        $('.secret-source').secretSource({
             includeTag: false
        });

        $('#banner-fade').bjqs({
             height: 320,
             width: 620,
             responsive: true
        });
});
</script>

This one will differ from slider to slider, as I took this one they have called it in this way, in other slider calling of the JavaScript functions are different. 

Now build your project and run this. Enjoy the slider.

Download the full source code here.

Saturday, June 13, 2015

Team management Part - II (Add Users)


Team Management
  1. Team Management part 1 (View users)
  2. Team Management Part II (Add Users) [Current]

In my previous post I have posted how to view users using SQL server query with database table structure and as a view method I have shown the ways of genealogy view using normal HTML, CSS and Google organizational chart.

In this post I will show you how to add a new user under one user. The post covers
  1. Full database table structure of users.
  2. Add new user under another user.
  3. Send confirmation mail.
  4. Confirm users via mail id (Using GUID). 
Full database structure:

Previously we have shown only the normal descriptions like email, name, phone no. and member's parent Id. But here we will include another 2 fields.  One is IsConfirm(bit) and another is IsDelete(bit).

Database Design:

UserId (Primary Key)
Int (Identity(1,1)) Primaty Key
Email
NVarChar(255)
Name
NVarChar(255)
ParentId
Int
IsDelete
Bit
IsConfirm
Bit


IsDelete: Its a bit value to save whether the user is deleted or not. In real process not a single value is being deleted during the delete or update. Each and every information about any thing is keep in store. So we use this type of flag to ensure the arising confusions. If this user is being deleted then the IsDelete field will be False (0), else True (1).

Now you will be little bit confused about the Password section. Where I am storing the password for the user. Here is the answer.

We are using a another table to store the passwords for each user using the UserId.

Id
Int(Identity(1,1)) Primary Key
UserId
Int
Password
NvarChar(255)
Date
Date


Using this table we can trace the user's password and their previous password and we can also use this as recovery process.

IsConfirm: This flag is being used to check whether the user is a valid one or not. Here we are sending an email after user's registration. As user go back to his/her mail box and hit the link, he/ she will be an authenticate user by updating the flag from False to True.


Check the diagram closely and understand the process flow of a full add user process.

Step 1:
Take the all inputs from user by creating a form. Here we will take users name, password email and other details. At the time of choosing the parent you can do two things.

  1.  Take the Id of current user (who is logged in). - Use the Session value to get the parent id
  2.  Use a Drop Down List to select the user. - Use a Drop down by binding all the users and their id. Take the selected one as Parent. 

Take the parent id and insert those data into database table. Get the ID from there using
@@identity or SCOPE_IDENTITY()

and with the help of that id insert the password into password table. Here you have to maintain another table for the process of email verification.

I am sure you know how to send the mail with HTML body. If not then go through this link. Here I have described how to send mail via Gmail and GoDaddy.

To get the email verification I am using GUID. To know what is GUID and how to generate that go through ...


We have to link this generated GUID with our user id, and IsConfrim. So what to do? Lets create the table structure.

GUID
NVarChar(255)
TableName
NVarChar(255)
Field
NVarChar(255)
Value
NvarChar(255)
UserId
INT
IsActive
Bit


GUID: The actual code to be generated (unique id)
TableName: On which table it will be updated
Field: On which field the action will be done.
Value: What will be the value after updation of the field.
UserId: On which user it change will be applicable.
IsActive: Is this still usable or not. At first when the GUID is creating it is True and after use it will turn into False.

How to create a GUID? 

To create GUID write down the following code snippet

Guid obj = Guid.NewGuid(); 
Console.WriteLine("New Guid is " + obj.ToString());

this will return a new GUID and with this you can perform all the operations you want.

All you have to do now is have to send a mail along with this GUID. To mail this you can use any of the SMTP server. To send via Google check this or if you want to send via GoDaddy server check this one.  As the mail content will be a link, may be a page link with the generated GUID. Like this

http://yourdomain.com/confirmuser?id=your_guid

or

http://yourdomain.com/confirmuser/your_guid

or any thing you want. You can easily get the guid from the URL via Query string.

string guid  = Request.QueryString("id");

when ever you got the GUID you can easily check whether it is previously used or not?

Select  IsActive from <table_name> where GUID="<your GUID>"

It will return either True or False and from that we can get that we have to proceed or not with this user. 

If True then get the table name, user id,  field and the value using this guid.

Select  TableName, Value, UserId, Field from <Table_Name> where GUID = "<your GUID>"

Took this data into a DataTable (say DataTable dt) for future use. Now you have to do the trick with this DataTable. The update statement will something like this.

Update dt.Rows[0]["TableName"].ToString()  set dt.Rows[0]["Field"].ToString() ="+ dt.Rows[0]["Value"].ToString() +" where UserId = "dt.Rows[0]["UserId"].ToString()"

Its is like

Update tblUser set IsActive="True" where UserId="<userid>"

Now update the table and send User a confirmation mail. Before exiting update the Guid table's isActive with false against the GUID.

Now your user is ready to use the application. Enojoy. 

Saturday, May 30, 2015

Logout user after browser close in ASP.NET C# using web services

Introduction:
Keeping a track of user's time in your web application is one of the most important issue to maintain. It not only helps to keep the track of user's but also it helps to solve any other analytical problems with application's data, like average in time, average out time, average time spent in your application etc. So how to keep the users login logout information of your web application.

By clicking on the login button you can easily get the login time, and I hope you have kept your session checking active during logging of your users. On other hand by clicking on the Logout button you can also trace the logout time. But what happen when user close the browser, then how will you keep the track of user's logout time. Here in this post we will discuss about this serious issue.

Using of Web Services
Instead of using  normal methods we will use Web services to get the logout time for the user.

What is Web Services?
According to MSDN
Web services are components on a Web server that a client application can call by making HTTP requests across the Web. ASP.NET enables you to create custom Web services or to use built-in application services, and to call these services from any client application.
Key Concept:
There is a function named onbeforeunload of javascript. This is called at the time of unloading the web page, whether you are closing the browser or closing the tab or redirecting to any other web page from that particular page, where it is coded. Do not use an alert() within onbeforeunload, it will not work.

Using this we are getting the login session id and passes it to the web services. And in web service we are doing our necessary thing(sql server entry or putting it in any notepad with login id etc.).

Using the code:
 Lets create a project named it whatever you want. Add a new web form and design it according to you.

On the aspx page's head section write down the following code.

<script src="https://ajax.googleapis.com/ajax/libs/jquery/2.1.3/jquery.min.js"></script>
<script>
        window.onbeforeunload = function (evt) {
            var message = 'You have started writing or editing a post.';
            var loginId = '<%= Session["LoginId"].ToString() %>';
            console.log('in');

            $.ajax({
                url: "Logout.asmx/LogoutMethod",
                contentType: "application/json; charset=utf-8",
                type: "POST",
                success: function (data) {
                    alert(data);
                },
                error: function (x, y, z) {
                    alert(x.responseText + "  " + x.status);
                }
            });
        }
</script>

On body you do whatever your design or work. In the web services write down again the following code. And make sure that [System.Web.Script.Services.ScriptService] is uncommented


[WebService(Namespace = "http://tempuri.org/")]
[WebServiceBinding(ConformsTo = WsiProfiles.BasicProfile1_1)]
[System.ComponentModel.ToolboxItem(false)]
// To allow this Web Service to be called from script, using ASP.NET AJAX, uncomment the following line.
[System.Web.Script.Services.ScriptService]
public class Logout : System.Web.Services.WebService
{
   [WebMethod (EnableSession = true)]
   public string LogoutMethod()
   {
       // take a log.txt and write on there with time
       string a = Session["LoginId"].ToString();
       File.AppendAllText(Server.MapPath("~/log.txt"),"Login id loges out "+a+ " at "+ DateTime.Now.ToString()+ Environment.NewLine);

        return "";
    }
}

Before run this create a log.txt file in your solution explorer, where all your log out log will be stored.

You can down the full source code here.  Now its your turn to do. Try it in your machine.

Popular Posts

Pageviews