

The very first thing you have to know what IIS is? Full form of IIS is Internet Information Services. According to Wikipedia IIS is
Internet Information Services (IIS, formerly Internet Information Server) is an extensible web server created by Microsoft for use with Windows NT family.[2] IIS supports HTTP, HTTPS, FTP, FTPS, SMTP and NNTP. It has been an integral part of the Windows NT family since Windows NT 4.0, though it may be absent from some editions (e.g. Windows XP Home edition). IIS is not turned on by default when Windows is installed. The IIS Manager is accessed through the Microsoft Management Console or Administrative Tools in the Control Panel.First of all create your own application with database and then prepare your published project.
To upload your application you need to enable IIS in your local machine. To do that visit my article on Configure your IIS in local machine. It will take 1-2 minutes to configure your IIS. After this go to Run and type inetmgr to open the local IIS. You can verify your IIS is working or not. Go to your browser and type
localhost. It will open your IIS in browser.
Now its time to add your application into IIS. Open your IIS and click on the Default under Site.

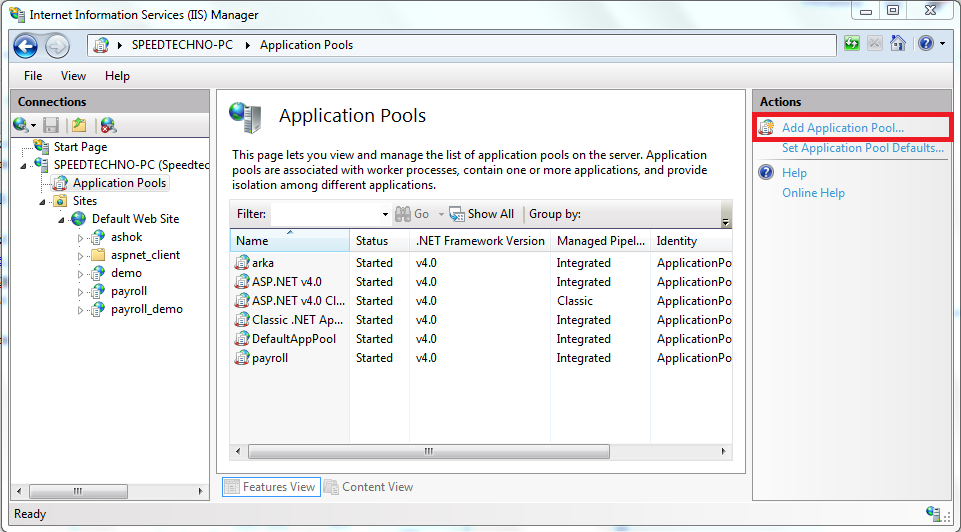
Now on the Default you can see there are some sites are uploaded previously in the above image. Now click on the Application Pool and you can see there are previously created application pool. To create your own application pool click on the Add Application pool.
Here input the name and .NET framework and save it. Now back to Site in your IIS. Select the Default and right click on the Default. Select Add Application.

After clicking on the link a window will be opened and there you have to give the alias name. It will be your site name. Suppose you are imputing "arka", so your site will be opened as localhost/arka. In the physical path select the folder where your published files are situated. Now a main thing, choosing the Application Pool in the DropDownList. Select your application pool that you have created. Now your site is ready to launch after clicking in the OK button.

Give your files and folders with full permission to access those from any other computer. To do that, select the root folder and go to properties. Within properties choose Security tab. Click on the Edit button and then Add button. From there go to Advance option and click on the Find Now to find your IIS User.

Add your IIS_USERS to add users.
Now another one important thing you have to do. Connect your .NET with IIS. To do that open your command and run these code according to your OS bit, either 32 or 64 bit.
For 64 bit
%windir%\Microsoft.NET\Framework64\v4.0.30319\aspnet_regiis.exe -i
For 32 bit
%windir%\Microsoft.NET\Framework\v4.0.21006\aspnet_regiis.exe -i
It will install the ASP.NET with IIS connection. Now your application is ready to launch without database.
It time to connect the database with your IIS.
Open your SQL Management Studio and select your database. Under Security section click on the User, and Add New user.

On the Login name click on the button beside and a new window will be opened with Login object. Click on the Browser and choose the application pool that you have created.

Now after adding click on the OK to add the user. Now go to Server Security section and Add New Login

Now in the opened window go to User map section and choose your database.

Now click on the button on the left side another new window will be opened with Schema object. There write dbo and click on the Check name. Click on the OK button to proceed. Now back to User Mapping and check db_datawiter and db_datareader. Now again go to the security part of your database.
Go to Securables and choose all the check boxes in Grant and click on the OK button.
Now your application is fully configured to launch. Browse your site and ask your friends to browse your site from other computers in your LAN.

0 comments:
Post a Comment